
Starting fall 2015 and ending fall 2016, I took it upon myself to build my own arcade cabinet. Starting in North Carolina, the idea came about when I met a man with many years experience in cabinet making. Building an arcade is something I’ve long wanted to do, but I never had the woodworking knowledge.
After speaking with him, he said he was excited about the project. We needed one of two things: a schematic, or we could go to an arcade and get the dimensions of a cabinet with measuring tape. The schematic we found catered more to the arcade I wanted to build – a two player machine – so that’s what we used. It was a replica of Neo Geo MVS on Ben Heck’s website. We used “scale” to get the heights and widths needed from the schematic. If a machine is 73” tall in reality, and 5.25” on paper, your scale is the result of 73” / 5.25”. This number gives you all the sizes you need. We used a basic protractor to get the angles after that.
Some things about the machine changed.It uses an HDTV. We included slots for the speakers below the screen instead of above. Last, wedidn’t include coin slots, but space for buttons and a door. The woodworker was good at sketching this on paper.
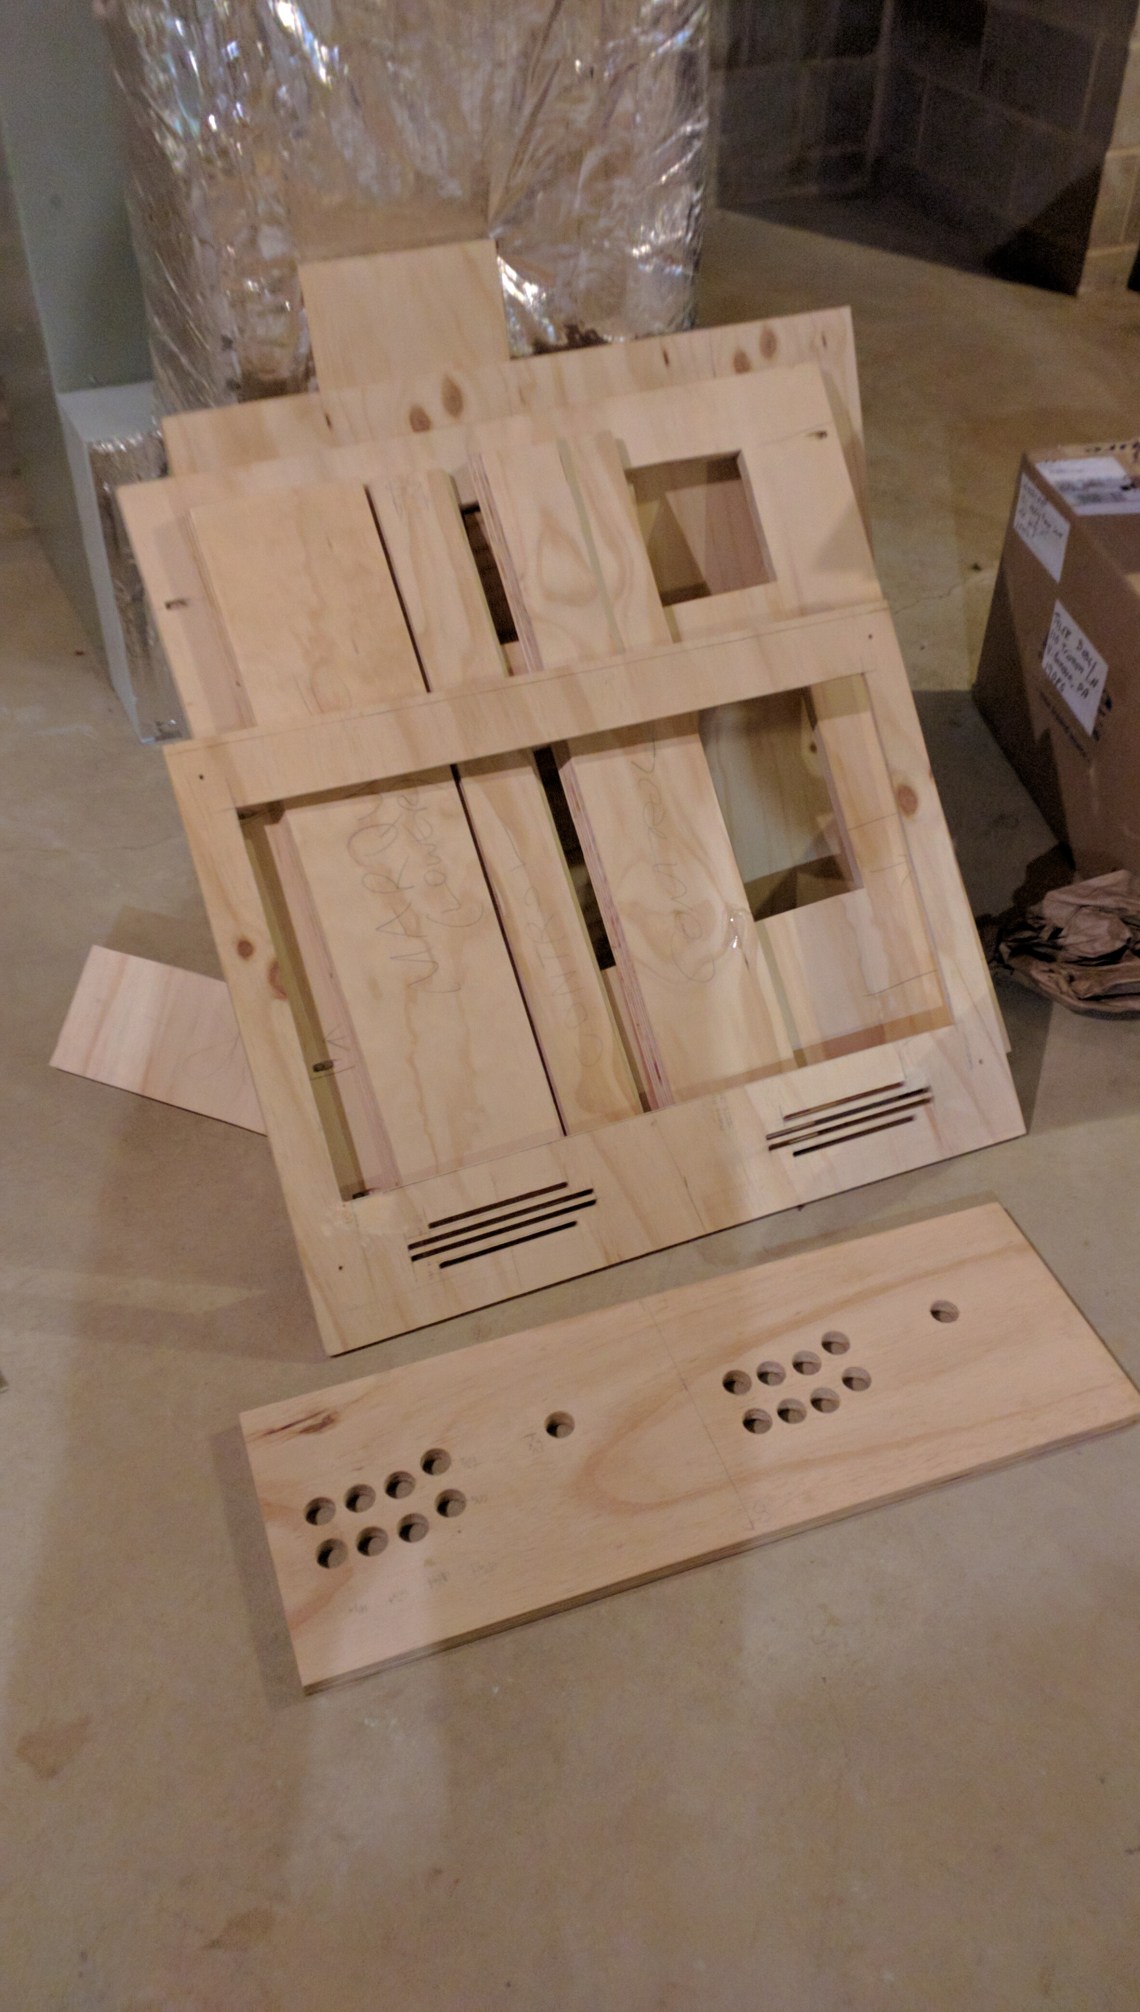
From here, we began. At the local hardware store we got enough three-quarter inch plywood for the wood pieces. Taking place over a few weeks, we cut every piece of wood needed with exact angles using a table saw that can be rotated on an axis. We drilled holes for the buttons and joysticks with a one inch drill bit, cut slits for the speakers, and cut wood for the TV, and a shelf to hold the speakers. We ordered other parts online, like a lock and key for the door, a piano hinge for the door and a fluorescent light for the marquee.
I ordered the buttons and joysticks from X-Gaming, which caters to hobbyist arcade makers. There are eight buttons and one joystick for each player, as well as six buttons total beneath the control panel. Our last decision was to use a PC for the gaming platformin the cabinet.
After this work, I went back to my hometown in Pennsylvania. The cabinet maker shipped the parts and things we worked on back to me. It took a year to complete because after I received the parts, they just sat in my basement for a long time. There was more work still like assembling a TV brace and the speaker shelf and I needed a professional.
After a lot of procrastinating, I found a carpenter who agreed to finish assembling the cabinet. He said because most wood was already cut, it wasn’t a lot of work. He put the wood together in two days, and charged me for his time. After, I painted the cabinet according to his recommendations. I used small foam paint rollers (available at a hardware store), and a white high-gloss enamel. It took a morning to prime the cabinet, an afternoon to paint it, and a day to let it dry.
We (now my father and me) needed a couple of things from here. One is artwork, and the other is acrylic (more commonly called plexiglass). I wanted a Street Fighter IV cabinet, so I found high resolution images of Ryu, Ken and Street Fighter IV logo. I put the images on a USB drive and went to a local FedEx Office. I said what size I wanted the images to be, and said that the Street Fighter IV logo was going to have light shining through it. They had good paper for all of it. I paid and got a call when it was ready. Now printed, we affixed the three art pieces with spray adhesive.
On to acrylic. We needed two pieces: one for the marquee, and one for the control panel (we realized it’s uncomfortable to play games on painted wood). The control panel acrylic was complicated. The shape is a rectangle, but there are holes in the control panel for buttons and joysticks, which need to be cut precisely. We also need screw holes bordering both pieces.
We found a local shop called Lasermation, which can cut acrylic with lasers. I had a good phone call with the owner, and we concluded I could bring in the control panel, and it could be scanned, to better cut the acrylic. The end result was phenomenal. The holes in the control panel acrylic were in the exact right places, and the buttons and joysticks slid right through.
Now, the one major thing left to do: wire the buttons and joysticks to the PC inside the cabinet. There are devices that allow you to do this, which are circuit boards with slots for the wires that connect to a PC via USB. I went with one that’s pretty reputable in the arcade building community, the I-PAC. I hired an electrician. It took him a day of work to install the I-PAC, and he did a professional job. The wired I-PAC plugged directly into the PC via USB, and comes with a piece of software for mapping arcade buttons to keyboard keys.
All that’s left is plugging in the PC. I used a fancy piece of Windows software for launching games called LaunchBox. LaunchBox launches automatically when you start the PC, so you can basically select the game you want to play and play it as soon as the machine boots.
That sums it up. I have a fully working 2-player arcade, which plays arcade classics, and any game that lends itself to an eight-directional joystick, and eleven buttons, one or two player. I forgot prices of some things, but excluding the computer, the cabinet cost $1200 to build. It was certainly worth the cost to me, as an enthusiast.

")


